In this section, we will be going step by step on the basic use of NEST from startup to completing a simple application. Our goal is that these step-by-step directions will guide you in the right direction of developing your very own application-using NEST. Once you have fully downloaded and installed NEST you will be well on your way to approach your first step in application development.
 Figure 1 NEST Loading Screen
First we begin with NEST login screen, submit account information created on NEST website if account information is not working then please go to NEST website and click “Forgot your password” option on the login page.
If problem persists even after entering login information correctly given then contact the NEST Support Team at contact@nxstinc.com
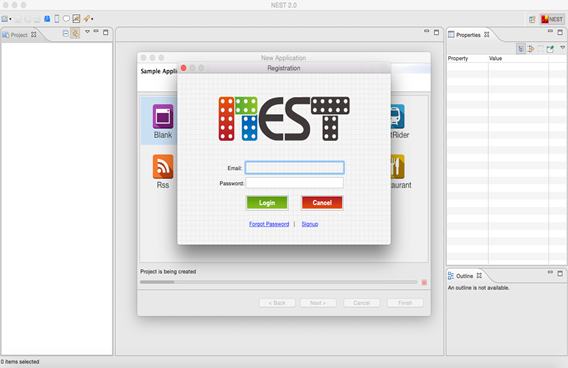 Figure 2 NEST Login Screen
** Before developing your application we recommend visualizing how you would like your application to look, how many pages, components, necessary functions and so on.
Take the steps below (A-W) to develop an application from a blank project to having a completed application that you have made installed on your phone. When taking each step please read carefully and refer to the screen shot images available on each step for additional guidance.
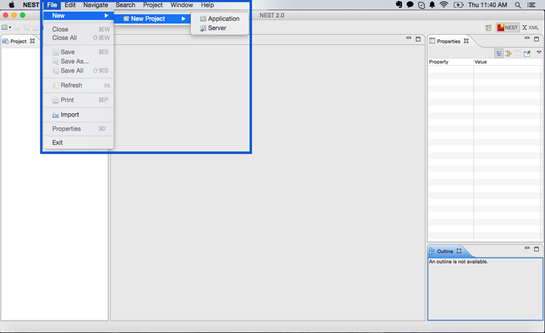
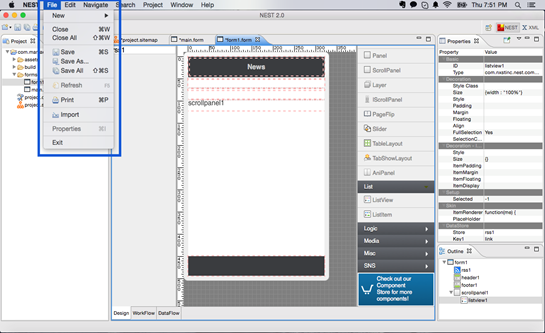
A. To start a new app project click on File located on the top left hand corner of the platform New → New Project → Application
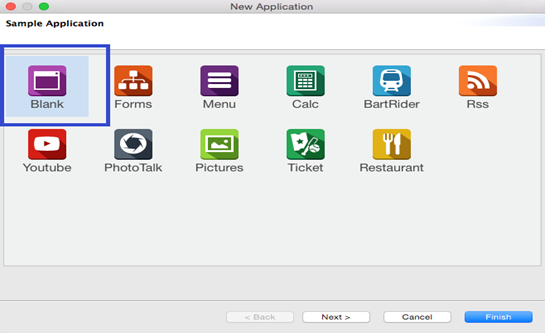
B. Click Blank to start without any pre-set components and click Next. If you wish to install a sample application to view on your phone without any editing then click the desired sample application of choice and jump to step T after sel
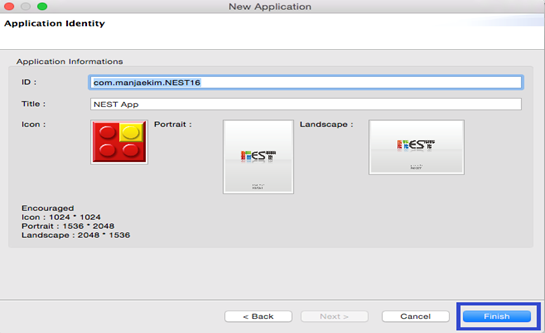
C. Project ID, Title, and loading screen image can be chosen at this time or done later
C.1 Once necessary information is inserted click Finish
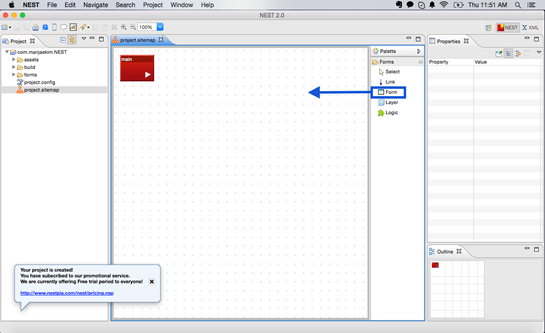
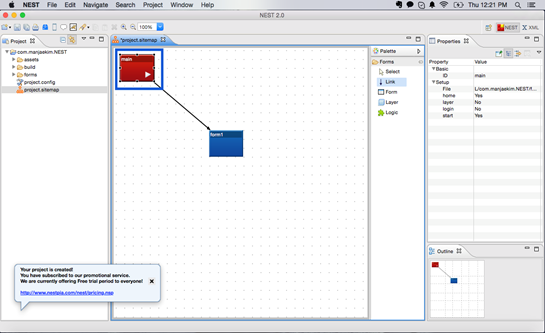
D. Click and hold down Form under Forms and drag onto Project sitemap window
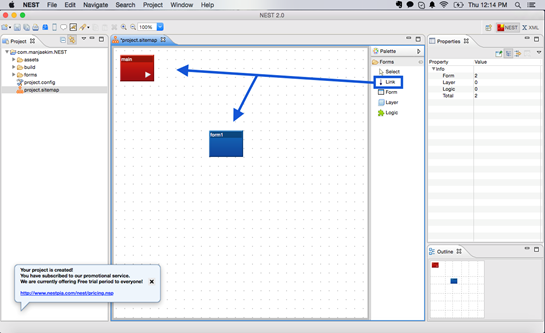
E. Click Link then click Main Form and lastly Form 1, this connects one page to the other.
E.1 Once you are done with the Link component click on the Select component found above Link to return to normal cursor functions.
E.2 Delete links by right clicking on them and choosing delete from the menu that appears.
F. Double Click the Form you want to customize first
F.1 The main Form is selected in this guide as indicated by the black box outlining the Form.
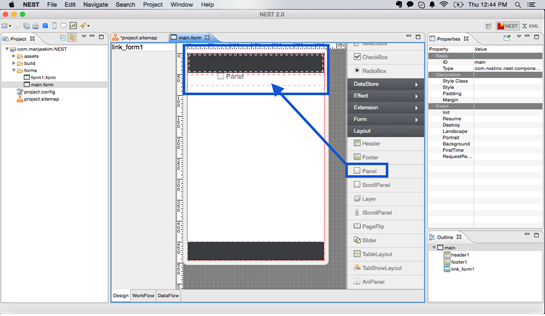
G. We will be adding a Panel to the Main Form, to do this click Panel found under Layout to the right of the Form and drag to the Main Form.
G.1 Notice the dotted red lining when adding panels, the lining indicates the position of each component on the Form.
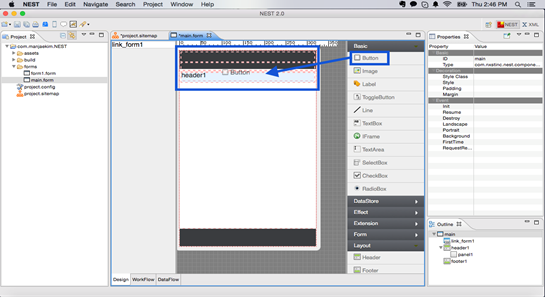
H. Add the Button component to the Form to and set an event with it to go to the next Form.
H.1 Button component is located to the right of the Form under Basic.
H.2 Again notice the dotted red lining that appears to indicate which location the component can be placed.
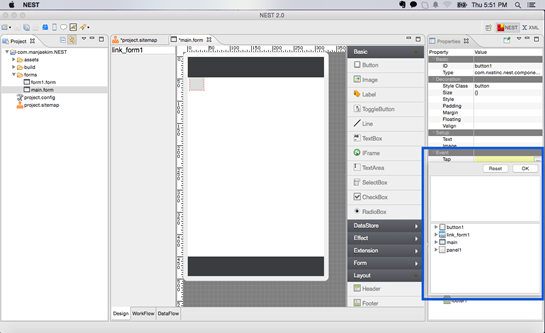
I. Click Button in the Form or click the components name in the Outline.
I.1 Outline windows is located on the bottom right hand corner.
I.2 A Properties window will show up on the right hand side of the platform.

J. Click Tap under Event and then the small box to the right of it to open up its options
J.1 Click the arrow next to link_form 1 to open it up and double click show then press OK.
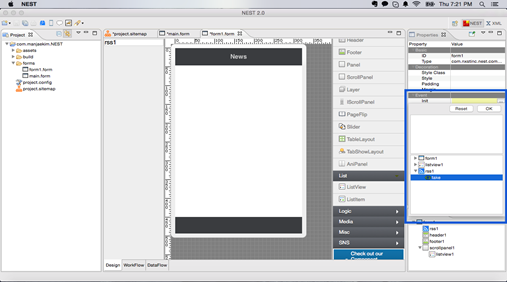
K. Go back to project.sitemap and double click Form 1 to open it up
K.1 Give this Form a title double click on header1 in the Outline
K.2 In properties under Setup there is a Text row.
K.3 Click Text row and type in “News”
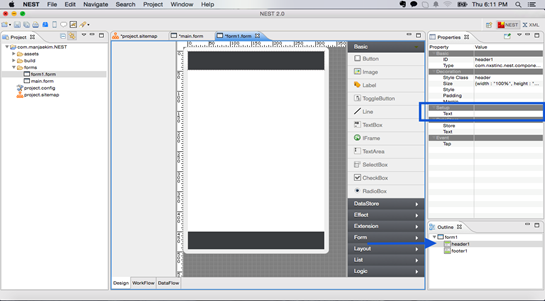
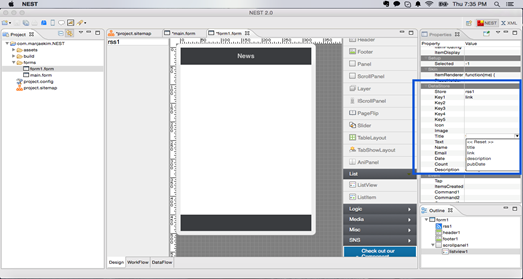
L. Click DataStore and drag in the Rss component into the Form.
L.1 Double Click rss1 found on the Outline
L.2 Properties box for rss1 should appear above Outline.
L.3 Click DataColumns located under Setup in the Properties Window.
L.4 Click the small box to open up its options.
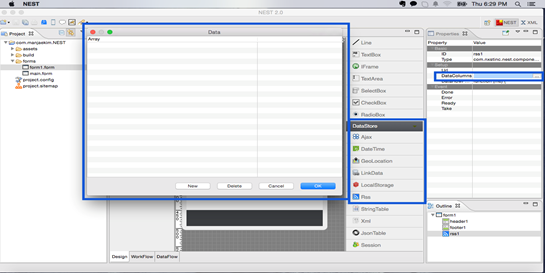
M. Click New four times, four rows of new should appear.
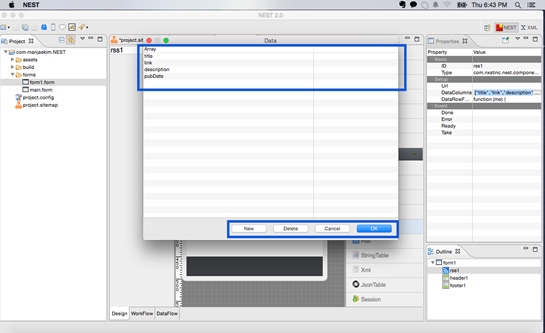
M.1 Click “new” row and replace new with “title” and press enter.
M.2 Do the same for the three other rows except replace “new” row with “link”, “description”, and “pubDate”
M.3 Remember to enter each time when you put in a new row name, click OK once done.
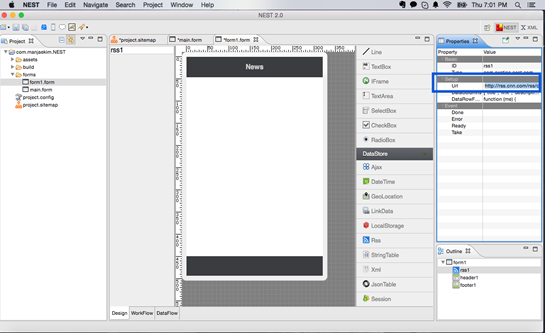
N. To get the URL of where the application will be obtaining its data.
N.1 Open any browser and use a search engine and search “cnn rss”, top choice should be a cnn rss page.
N.2 At the cnn rss page there is a list of URLs and their category.
N.3 Copy and paste the Top stories URL into the URL spot of the properties under Setup.
O. Find the ScrollPanel component under Layout and drag it into the Form.

P. In the Outline on the bottom right of NEST double click form1.
P.1 The Properties window above the Outline should change to form1 properties.
P.2 In Properties click Init under Event and click on the small box that appears
P.3 On option box that appears, click the arrow next to rss1 → double click take → OK
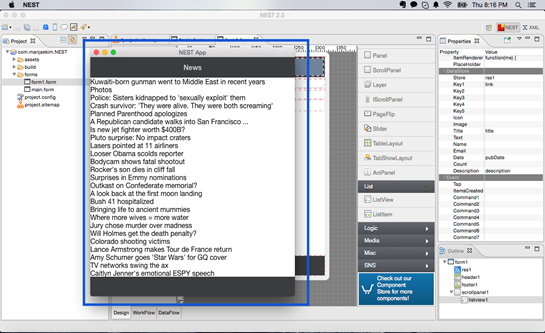
Q. Click listview component under List and drag it into the Form
Q.1 Components once added can also be moved in the Outline window to place where you want it
Q.2 Double click listview1 in the Outline window to display its properties.
Q.3 Find DataStore in properties and select as follows.
Q.4 Store → rss1, Key1 → link, Title → title, Date → pubDate, Description → description.
R. Congratulations! You are now done with your first application development.
R.1 Go to File on the top left hand corner and save you application
S. Test your application works by using the simulator.
S.1 Simulator can be found under Project of the NEST menu bar, between Search and Window.
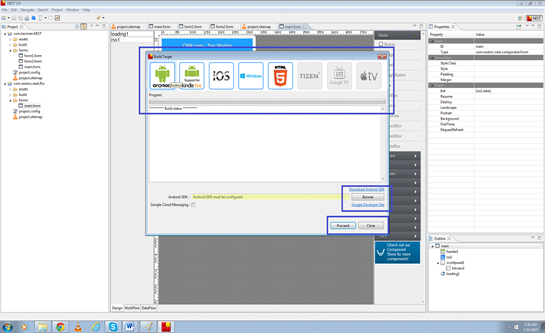
T. Choose the app market you wish to deploy your finished application to.
T.1 If you need the Android SDK there is a link for you to click and download.
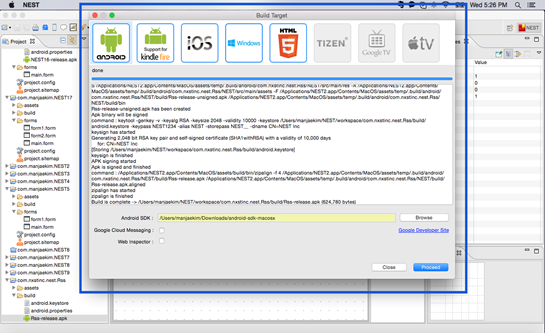
T.2 Once SDK is installed; proceed to building the app for deployment to any app market.
T.3 Click Browse and select where the SDK file was installed.
U. After building NEST App.apk will appear in the project folder of your application.
U.1 Project folder is on the left side of NEST.
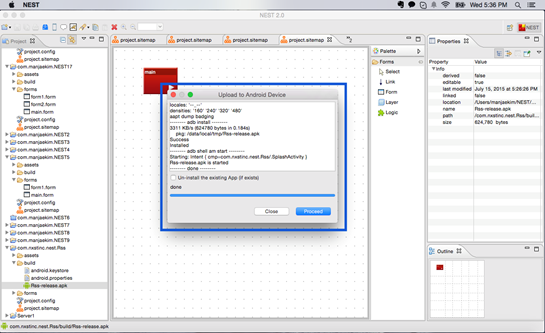
V. To view the app on your device go to the .apk file located under the project folder
V.1 Right click the .apk file go to Open With and lastly click Installer
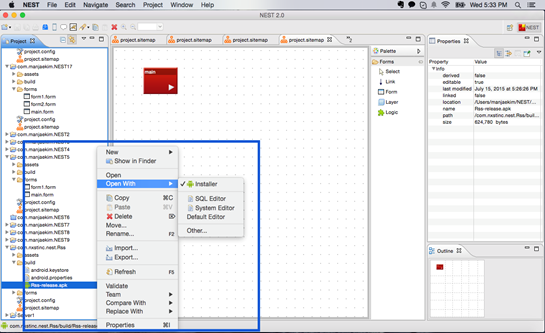
W. Click Proceed when the Installer box comes up.
W.1 You should now be able to view the application that you have made on your phone.