Now that we have gone over the basic features, descriptions, and definitions, let’s start applying them to creating applications.
- Project and App Settings
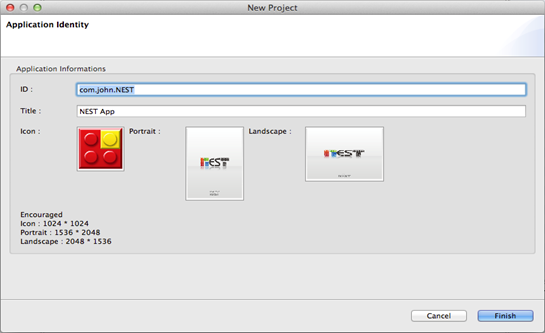 Figure 3 Project & App Identity
- You can set ID, Title and Images of your app under App Information. Title and Version of your app can be edited later on.
- ID is another way to keep track of your app. If you have a personal domain name, you may input your information here. If not, you can create any domain.
*If you signed up for Apple iOS Developer Program, we recommend you use your Apple Application ID.
*If you are not signed up for Apple iOS Developer Program, you may select ID of your choice or ID provided by NEST.
- Input your app name under Title. This will be the name of your app shown on your device after you deploy it to your device.
App name can consist of upper case, lower case letters, symbols, and space.
* Apple iOS Developer Program
https://developer.apple.com/programs/ios/gettingstarted - ID is another way to keep track of your app. If you have a personal domain name, you may input your information here. If not, you can create any domain.
- Application Icon & Loading Image
- The Icon image is the image that will be displayed as your applications icon image on smart devices it is installed on. If you don’t have a prepared image prepared at the beginning of development then don’t worry you can
come back to it later and select the image you wish to use.
The recommended size for the icon is 1024 x 1024 pixels. - Portrait & Landscape image is the loading screen image displayed when the app is opening. The recommended size for splash image is 1536 x 2048 pixels.
* More,
Do not worry if your image is not of the recommended size. NEST will automatically adjust the image size to fit the icon as well as the Portrait & Landscape image. If the picture you chose is larger than the recommended size, it will be scaled down. If the image size is too small, it will still be scaled to fit the screen, but resolution may be unclear. - The Icon image is the image that will be displayed as your applications icon image on smart devices it is installed on. If you don’t have a prepared image prepared at the beginning of development then don’t worry you can
come back to it later and select the image you wish to use.
- You can set ID, Title and Images of your app under App Information. Title and Version of your app can be edited later on.
- Finish Project Wizard
Once you have finished setting basic information about your app project, click Finish and get start started on developing your own App. After the project is created, you can view the applications files under NEST ProjectExplorer. Under Sitemap Editor, you can create Forms and Links to set relationships between the Forms. The number of pages your application will have and how they are connected with each other can be set on the sitemap editor.
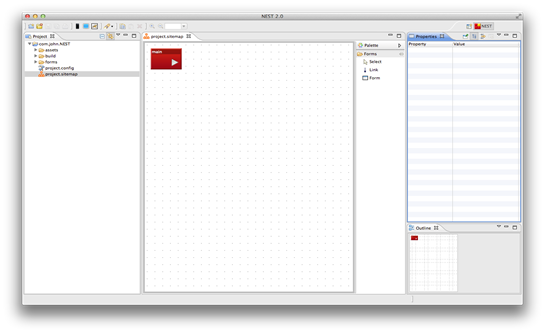 Figure 4 NEST Project Window